Pages

Monday, April 1, 2013

Monster Book of Monsters: Part Three

Just held together with pins at the moment
 
Well, my high hopes for fabulous teeth were temporarily dashed when this is what I created.
This will not do at ALL!
I had decided that I was not going to make any sort of template or pattern because I want both books to look different.  So I picked up a piece of fabric and folded it in half and just stared sewing teeth.  It actually didn't look too bad... Until I tried to turn them right-side-out.

Back to the drawing board.

After some thought, I decided that making each tooth individually was the way to go.  Again, I didn't use any sort of pattern.  I just sewed what looked like a tooth.  Just one at first.  It looked perfect! So I went all out and sewed up a whole bunch.  Then I arranged them on the table and switched them around until I thought they looked right.
 
 
Then I put a little stuffing in each one and pinned it to the "gums".  I put a piece of batting between two layers of red to plump them up just a bit. 
 
 Made myself a tooth sandwich and sewed it up.
 
 
 I also made the tongues using red and a little batting for substance.
 
 
 And here is where my Monster Books of Monsters sit now.  All pinned together.  I need to sculpt around the eyes a little more.  Both of the girls just want to hug these guys, and they are supposed to be a little menacing.


Here is what they are trying to look more or less like. 
These images were found on a Google Images search for "Monster Book of Monsters"


Next I need to sew these together and come up with a way to get the title on them.
Thanks for looking and following my progress!
:) Pin It

Tuesday, March 26, 2013

Monster Book of Monsters: Part Two

I've lost my crafting mojo.  I just haven't been in the mood to craft.  Today, however, I decided that I need to finish these Monster Book of Monsters.  I've only been working on them for about ten months!!!  You can see the start here, if you'd like.


So, I got out my eyes and chose suitable ones.


I made little pillows to put them on, and attached the eyes.  These are very lightly stuffed so that they can be sculpted under the fur.
 
 
I carefully slit the fur after determining the position of my eyes.   Then I sculpted a little around the eyes. I will probably do a little more sculpting detail later.  He's going to have trouble seeing with all that fur in his eyes! 


 So I trimmed a little around the eyes.
This is where my Monster Book of Monsters stands at the moment. 


Next up: The teeth. I'm making them soft.  These will make or break this project, I think.
I have high hopes for this.

Thanks for looking!
:)

Pin It

Thursday, February 14, 2013

Solid Sugar Scrub

In a convienient single use size!  And only three ingredients.

I used the directions I found here, at Homework.  Carolyn used canola oil, I used coconut oil instead, along with sugar and grated soap.


 I just made a small test batch.  The amounts listed in the instructions made six in my little mold.
 
 
 How cute are these???
 
They hardened up over night and I stored then in an old plastic container.  I don't like glass in the bathroom.  That is a disaster waiting to happen in my hands.
 
The only thing I would change about these is the soap I used.  I found the Pears to smell kind of medicinal and I don't like that.  Other than that I just love these.  I don't even require a moisturizer after my shower because of the coconut oil already in there.  My daughter loves them too, so I need to make a big batch next time! 
 
Thanks for looking!
:) 
Pin It

Monday, February 4, 2013

Solid Lotion Bars

Who knew lotion could be a solid?
I saw the instructions here at Frugal by Choice, Cheap by Necessity.  I didn't have almond oil, which is what she used, so I substituted grapeseed oil.  I also have no idea where to find beeswax but I mentioned it to my dad and he just happened to have some lying around so he gave it to me. 
Thanks Dad!
I had no idea that beeswax smells so good.


My first step was to gather my ingredients.
It calls for equal parts (by weight) of everything so I took some of my beeswax and weighed that first.  Then weighed out my other ingredients to match what the beeswax weighed.
 
 
I put my iPod on so I would have some fun music to listen to... 
I still LOVE this song!!!


Then I melted the beeswax in a makeshift double boiler over medium heat, then added my coconut oil, and my grapeseed oil.  When they were all mixed, I dried the bottom of the bowl and carefully poured the mixture into silicone baking cups that I had on hand.


55 grams of each ingredient made 6 nice sized bars.


I'm not a fan of the 'sharp' corners, but they wear down really fast.

These bars feel very nice.  Not greasy or sticky at all.  And my hands smell faintly of honey!  Mmmmmmm....
Thank you Sarah, for teaching me how to make these!

Thanks for reading!
:) Pin It

Thursday, January 24, 2013

Neville's Remembrall


In case you don't know what a remembrall is, it is a clear glass ball that fills with red smoke when you have forgotten something.  Neville receives one as a gift from his grandmother in Harry Potter and the Philosopher's Stone.  It immediately turns red, prompting Neville's quote in the above photo.
Photo found here
I have had the idea for making this for at least a year, but I couldn't find a suitable material for the gold trim.  A little while ago, I just happened to find the perfect ribbon.

Instructions aren't really needed.  I stuffed small pieces of gauzy red ribbon into a clear glass Christmas ornament and carefully glued the gold ribbon around the ball.
That's it!

Thanks for reading! Pin It

Saturday, January 19, 2013

Superhero capes for super kids!


My cousin's 3-year-old little boy uses his bathrobe as a superhero cape.  I am of the opinion that every child should have a superhero cape.  My 14 year old daughter even has one, and has had it for years! Sadly, my 19 year old doesn't want one.
When I found out that my super small cousin didn't have a real cape, I decided to remedy that situation.  And while I was at it, I made one for his 1½ -year-old sidekick, um, I mean sister, and one for the very littlest cousin.
 
I started by picking up some fleece in colours that I thought would be good for budding superheroes.
 
 
 Then I got my cousin to tell me the measurement of her children from about the back of a t-shirt collar to the floor and I used that measurement (minus just a little) to get the  length of my capes.  I wanted them to be almost floor length so they could use them for quite a while.
Don't look too, too close.  I took this picture after the capes were almost done. 
That is why you can see the collar detail.
Sometimes I forget to document my progress.
 
I sewed their initials onto the back of the cape and added a little colour to the collar.
I also sewed a little piece of velcro to the collar with the soft side facing their skin so they won't get scratched.  I want the capes to be able to tear away easily if the kids get them caught on something.  That is why they do not tie closed.
 
Then it was on to the tiniest of our superheroes! He is just barely one year old and I thought a cape like his slightly older cousins might be a little dangerous for him.  I also didn't think his initial on the back would look like an initial, so I painted the front.
First I designed my stencil on the computer and printed it out.  I laid that over a piece of freezer paper and cut my design out.
 
I had to be sure to save the "holes" from the letters p, e, O and the second e.
The arrow is pointing at the "holes" from the letters.
 
Then I ironed the stencil onto the shirt. Being very, very careful to place those holes I saved in the correct spot.  Then I used my fabric paint and painted my stencil, forgetting to take pictures, of course.  The next morning, I peeled my stencil off the shirt and heat-set my paint (as the instructions on the bottle tell me to) 
 
Then I sewed the soft side of some velcro to the shoulders of the shirt, cut out a cape shaped piece of fleece and sewed the matching side of the velcro to the shoulders of the cape!
 
Ta-da!!!
 
This active three-year-old LOVED his cape!  His sister...not so much.  She didn't hate it, I just don't think she really cares at the moment.  I can live with that.  But that is why I have no pictures of her.
 
I didn't get a picture of Super Owen because he wasn't wearing an outfit that allowed for changing his shirt, but his Dad sent me this picture the next day!  Well, without the mustachioed happy face... 
 
I'd say that the capes were a success.  :)
 
Thanks for reading!
 
 
Pin It

Wednesday, January 2, 2013

Come to the Dark Side, We have ... ... CHOCOLATE!

Yeah, I know he isn't perfect.  But he's still very cool!!!!
Dark chocolate, of course!
 
 
My oldest daughter gave me this super cool Darth Vader ice cube tray for Christmas.  And it creates these super cool Darth Vader ice cubes!
Coolest ice cubes in the galaxy!
 
I have tried about half a dozen different ways to try to get clear ice and have only come close once.  So I switched to chocolate.
 
Unfortunately, my chocolate is a little on the old side.  I know, how does that even happen!?  Who know that old chocolate doesn't melt well?  Not me, that is for sure.  So all the chocolate you see in this photo was scrapped.  :( 
The next batch didn't melt much better, but at least it was workable.  And tastes fine.  That is the most important part.
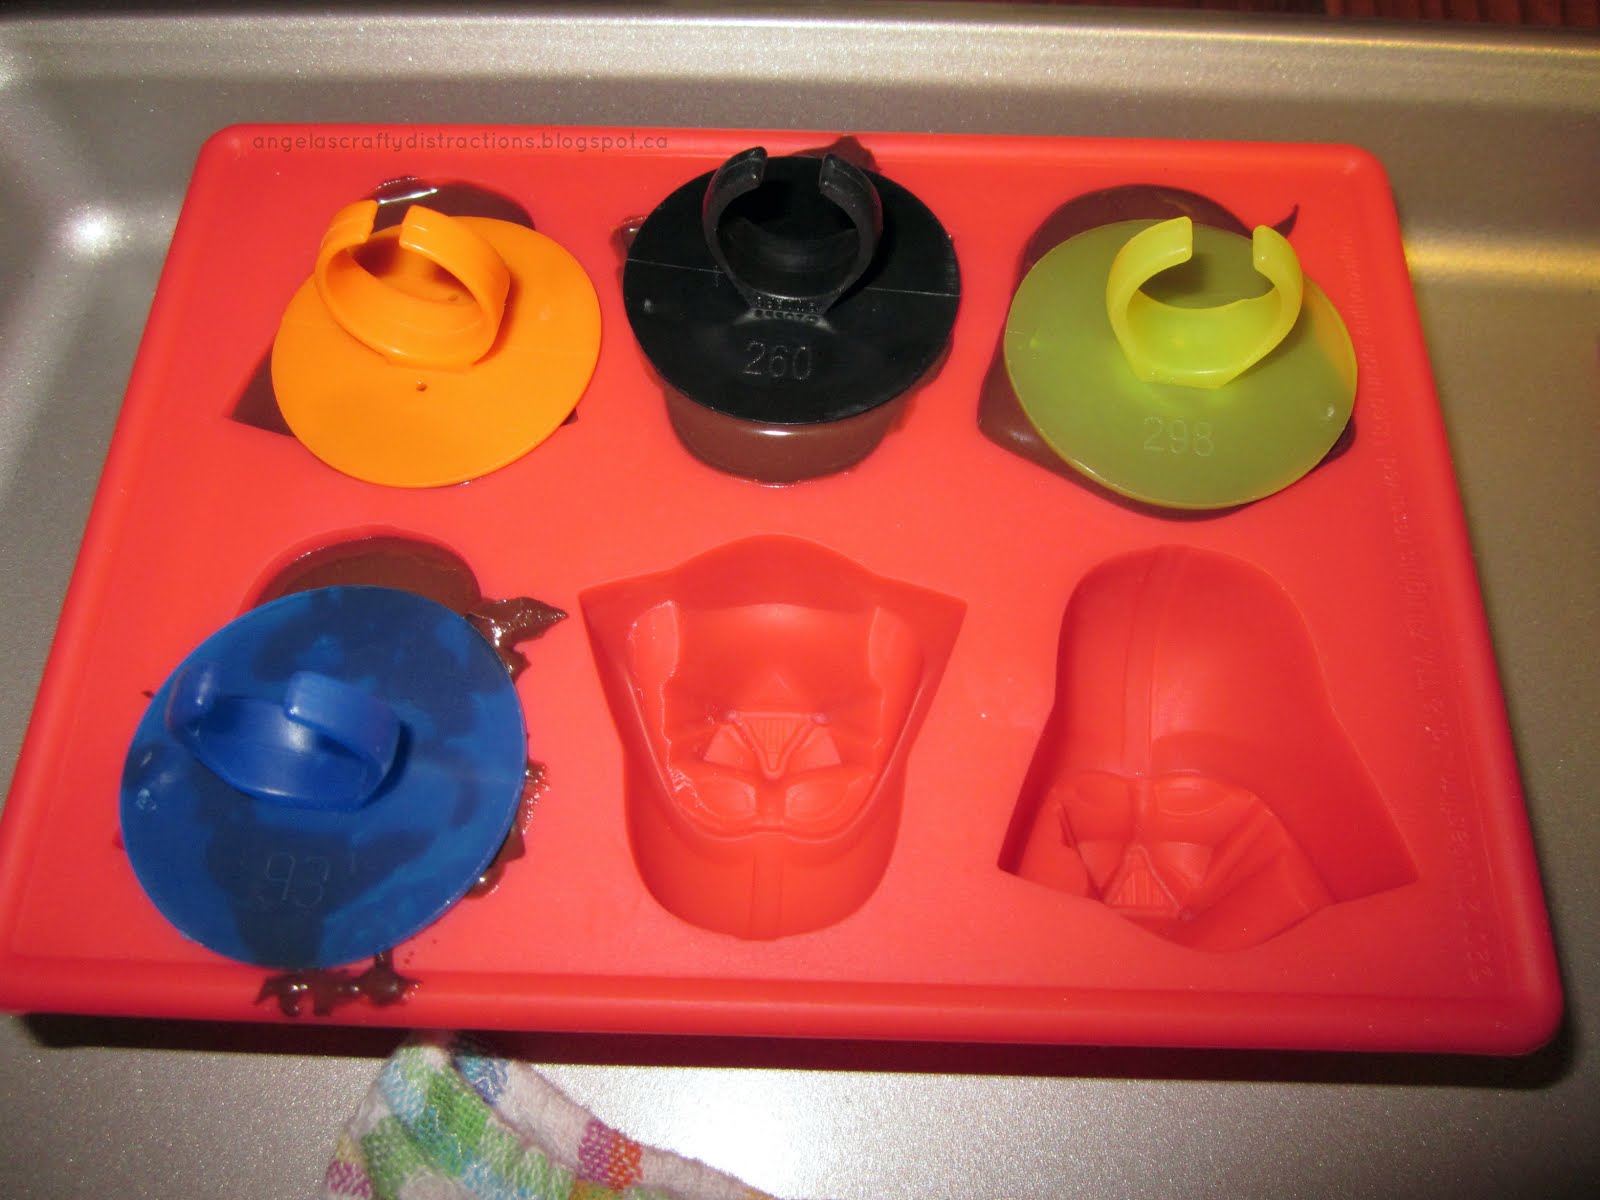
My youngest has been saving her Ring Pop rings, at my request, for a project just like this.  They have been thoroughly washed, but I boiled them for a few minutes just to be sure.  
 
All of my ingredients and materials on a tray.
 
When my chocolate melts properly, I just boil a little pot of water on the stove, remove it from the heat and place my Pyrex measuring cup in the pot and let the chocolate melt, stirring occasionally.  Sometimes I have to reheat my water. Normally, it melts to a very smooth, pourable consistency.  Not today.  It was a smooth, spoonable consistancy.  So that is what I worked with.  The second time.
 
Here is the mold, all ready to go.
 
 
After I spooned the chocolate into the molds I tapped it on the tray several times hoping to get all the air bubbles out and trying to get chocolate into all the nooks and crannies of the mold.  This would have worked really well if the chocolate had melted better!
Once I was pretty sure I had gotten all the bubbles out that I could, I placed my rings.  Then waited. And waited.  And put the mold in the fridge and waited some more.
 
 
When they had set, they popped out of the mold quite easily!  Several imperfections, but who cares!  Next time they will be much better.  I am sure of that.
My youngest has already done quality control testing and gave me a thumbs up.
So, I went from having the coolest ice in the galaxy to having the coolest ring pops in the galaxy!
 
Now, I just need more chocolate.....
 
Thanks for reading!
Pin It