Pages

Showing posts with label sewing. Show all posts

Monday, May 5, 2014

Made it Myself: Tablet Cover

 
My tablet rarely leaves the house, but I wanted protection for the odd time it does.  I didn't want a sleeve or pouch.  And I wanted to be able to prop my device up.   I knew that much. But I didn't know just what I wanted.
 
Then I found a perfect solution!  It was in a tutorial I found here, at Chica and Jo, while doing a Google search for  DIY tablet cover.  The instruction are super easy to follow.  I had to adjust the measurements a bit to suit my tablet.   The instructions call for chipboard, but I don't even know what that is. They suggested the inside of an old binder, but ours were all made out of corrugated cardboard.  That is no good!  I ended up using a piece of picture matting that I managed to acquire for fifty cents.  I used hair bands for the elastic.  I cut up a wide one for the corner pieces and used a thin one to hold everything shut.  I got both of those in a bunch for  a dollar, and I still have four or five thin ones left.  Everything else I already had on hand!  So not only was this easy to make, it only cost me $1.50 + tax!  it doesn't get much better than that!
 
 
I will let the pictures show you the awesomeness of this cover:
Here we are all closed up.  This is the front.

Still all closed up. This is the back.  Yes, I ironed first, but then I let it sit for a week....  don't do that.  Trust me.

Here it is all opened up.

And opened up with everything neatly tucked up in the elastic.

As you saw in the first photo, you can also prop your tablet up to watch videos.  I don't know what took me so long to make this!  I am glad that I made it though.

Thanks for looking!
:) Pin It

Saturday, April 5, 2014

Tiny cookie change purse


I don't know about where you live, but here in Toronto we need to deposit a quarter into the handles of shopping carts in order to unlock and use the carts.  I am often scrounging around my purse, hoping I have a quarter.  I kept a few in the truck we used to have as it had a handy slot for coins in the centre console.  Unfortunately for me, our current vehicle has no such spot.  I needed something to keep my "shopping cart quarters" in. 
Also, unfortunately for me, this vehicle is my husbands "baby" and I have been told in no uncertain terms that I am not allowed to put anything "cute or girly" besides me ;)  in this vehicle.  What a dilemma. 
 
I had seen these!

http://www.craftpassion.com/2012/01/macaron-coin-purse.html/2
Click the photo to go to the tutorial

Cute, right?  I had to have one! And it was perfect for my quarters!  And, if that wasn't enough, I had everything I needed except the covered button thingies.  After some careful thought, I found a way around my problem.

Black.  Just like Hubby's Jeep.  How could he complain?

They start out with these covered button thingies.  I had trouble finding big enough ones.  I finally found some in a tiny little fabric store.  They were just like these ones.

http://www.dritz.com/brands/showcase/details.php?ITEM_NUM=14-60


After muddling my way through the instructions (the part about preparing the zipper was a little confusing for me)  I finished my little cookie quarter holder!  I found a way to make it a bit cute and girly too.  First I spied some pink satin in my scraps and was going to use that, but then I laid eyes on the red.  They looked so good together, I couldn't not use it!


I made my loop bigger than the tutorial intentionally.  It is wider because I was using what I had on hand, but I purposely made it big enough to hang on to.  I don't want to be fumbling around in the cold to access my quarters.

Don't tell him I said this, but I think I got away with putting something cute in the Jeep!

Thanks for looking!
:)

Pin It

Saturday, March 15, 2014

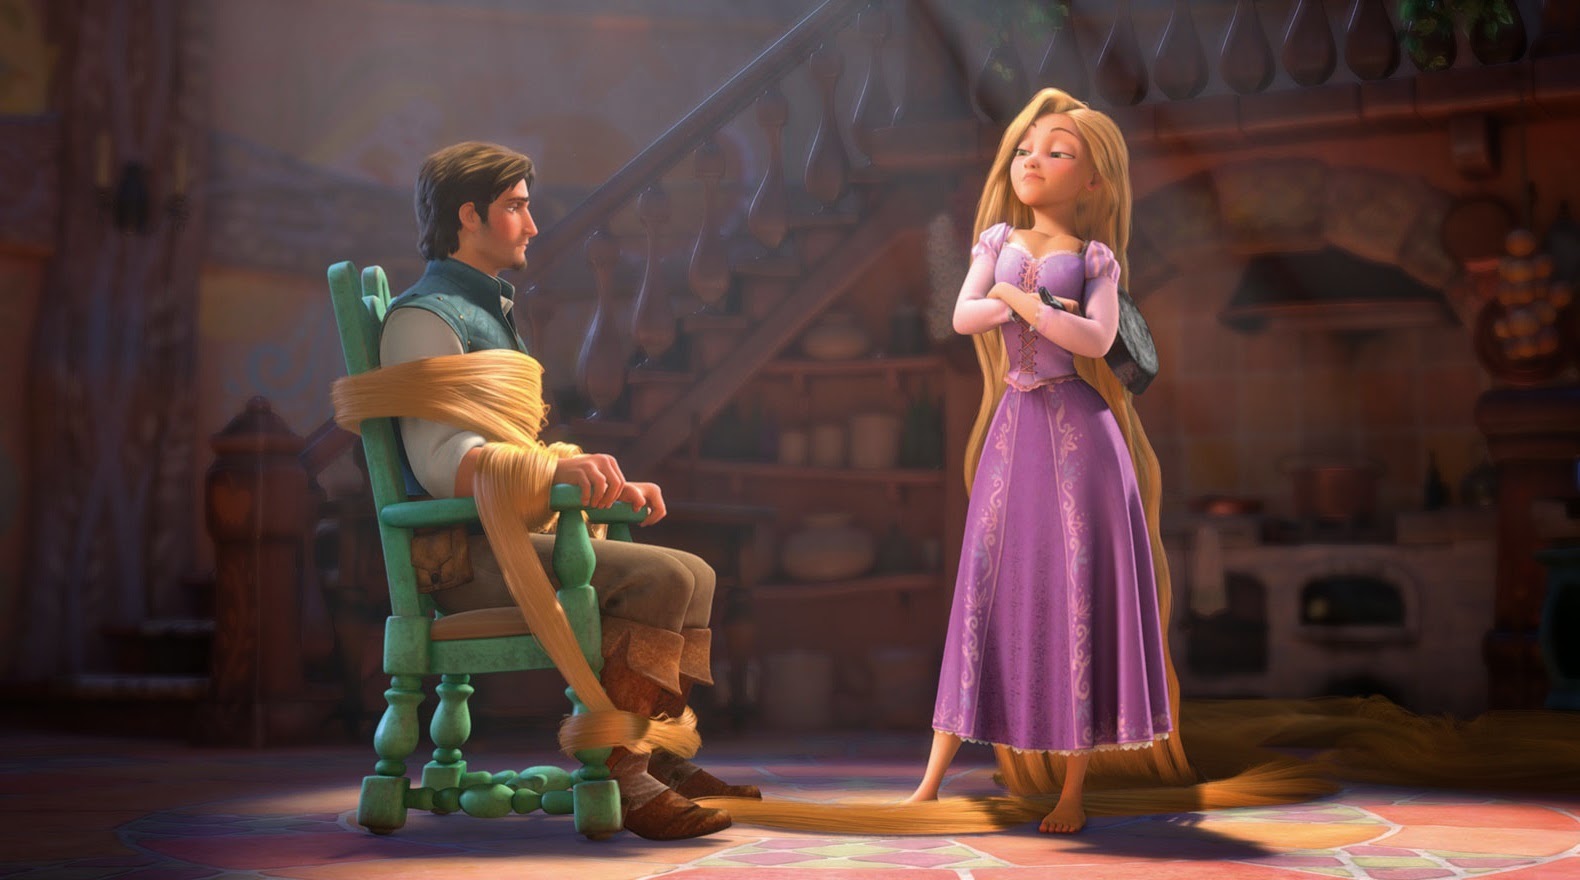
Rapunzel dress for my princess


She wanted to be Rapunzel, from Disney's Tangled for Halloween.  If you haven't watched Tangled, you should!
Did I happen to mention that my little princess, who wanted to dress as Rapunzel, is fifteen years old?  And she wanted to look like Rapunzel, not a trampy version.  (You have NO idea how much that pleases me!)

They don't seem to make nice costumes for anyone over ten years old, and even then they are pretty crappy quality -or super-expensive.  So I decided that I would try to make one for her.
The only experience I have making a dress is when I made my own Sally Ragdoll costume two Halloweens ago.  I didn't know what I was doing then either.  After looking at pictures online, I picked up what I thought was the best fabrics and embellishments for the job.  This costume cost more than Sally did, I think it totalled about $33, which is still a bit expensive to me, but better quality (and length!) than the store bought ones.


I looked online for tutorials from others who have made a Rapunzel dress.  I took elements from several different places and did my own thing. That is why I am not crediting any specific source for any sort of tutorial.  I didn't follow any!

So, here is the dress mostly finished.  I made the top a double layer since the fabric I chose was quite thin.  She wore it to an event at this stage of completion.  She was helping out at her old elementary school for an activity/family night the school was hosting and the theme was fairy tales.  I made one sleeve a smidge too small and it tore up the seam.  Twice.  I just re-made it the first time, the second time I made it a little bit bigger and it held.  The dress itself is done here, it just needs some painted embellishing on the skirt done now.
We still need detail on the front panel.
 I think the most difficult part of the whole dress was getting all of those eyelets installed.  I smashed my poor thumb in the process.

This is what I was going for:
http://movies.disney.com/tangled-gallery
(if I did it right, the picture itself links to the Disney site I found it on)

I agonized over how I was going to post the finished dress.  I feel that if my kids are going to have their photo on the internet, THEY should be the ones to put it there.  So, using my fabulous photo manipulation skills, I pasted Rapunzel's face over my daughter's.  Not bad, if I do say so myself!!  (hahahahahahahahahahaha!)   I even made her a Pascal (Rapunzel's chameleon sidekick) to go with her costume.  You see him at the top of this post, and on the top of her head here.


She is even posing like the picture above.  :)


At one point in the movie, Rapunzel braids her hair up and puts flower in it, so that is what we did with our Rapunzel.

She has already worn this dress three times, two of those times, it was totally finished.  I would say it is a success.

Thanks for looking!
:)

Pin It

Tuesday, October 29, 2013

Salvaging a shrunken sweater

 
My mom accidentally shrunk her wool sweater.  Not a whole lot, but enough that it didn't fit her anymore, so she brought it to my daughters to see if one of them would like it.  It isn't their style and they both find wool to be too itchy.  Mom suggested that if the girls didn't want it, to pass it along to someone who would, or donate it to a thrift store.  I decided that instead of donating it to a store, I would make it into something that Mom could use.  After all, she bought the sweater in the first place because she liked it, so I thought that she should keep it and continue to enjoy it.
 
But, what could I do?  I turned to the internet and found a tutorial here to change a sweater into a bag.
 
Perfect!
 
So here is what I started with.  Well, not quite.  This was taken after I washed it a couple more times to felt it.  It REALLY shrunk then! 
 
 
I meticulously followed the directions I found.  The only thing I did differently was the pocket.  I didn't think that a small outside pocket would get used, so I decided to make it a decorative heart.


And here is what I ended up with!


I like bags with flat bottoms.


See?  It is a pretty little pocket.  More for decoration than anything.  I thought about sewing it all the way around, but went with a pocket just in case she does have a use for it.


Wool sweaters sure do shed a lot!


Then I took some of the scraps and made my cat a new catnip mouse.


Thanks for looking!
:) Pin It
Thursday, June 13, 2013

Earrings and sewing and T-shirts, Oh my!

I'm not focusing these days.  I have completed several small projects though.


I've had these beads since about November and finally got around to making earrings with them.
The crystals in both pairs glitter beautifully.  Unfortunately, it is a bit overcast today so there isn't any good light for them to reflect.


I made myself a geektastic Iron Man 3 t-shirt.  Too bad I haven't seen the movie yet!
I gave up trying to take a good "selfie"  I took lots and this was the best.

Hopefully Robert Downey Jr. would be impressed.


And I sewed my self a swimsuit cover-up.  I got the tutorial here, at Grits and Giggles.
My only problem with this was that I eyeballed it.  Don't do that.  Use a tape measure.  I had to pick the seams and redo them! 
I think it is really cute.


Next up,  a tablet cover.  Hopefully that will be done within a week.
Thanks for looking!
:) Pin It

Monday, May 6, 2013

Monster Books of Monsters ~ FINISHED!

Finally done!  Hooray, hooray!!!!!!!
I started these almost a year ago, it's about time I got them finished! 
If you'd like to see the progress, you can see part one,  part two and part three by clicking the links.
 They still look pretty cuddly, but I am happy with them.
 
After getting them all sewn together, all that was left to do was put their titles on.  I wanted it to look like gold embroidery.  I started by trimming the fur to give myself an area to paint on.

Then I practiced on some leftover fur that I had saved. I had gold glitter paint that I was planning to use, but it doesn't show up by itself.  I tried painting the letters in black, brown and yellow first, then went over them with the gold.  I liked the look of the yellow the best.  I have so many smears of yellow on my practice fur, it is difficult to see what I have here, but it is all my practicing.
 
Then I painted my titles on.
 
"Monster Book of"


"MONSTERS"

 
A front view.  He has a little fur blocking his leftest eye, I see.
Maybe I won't give these to the kids...


Now that I finished these, I can make my Iron Man T-shirt!
Thanks for looking!
:) 
Pin It

Monday, April 1, 2013

Monster Book of Monsters: Part Three

Just held together with pins at the moment
 
Well, my high hopes for fabulous teeth were temporarily dashed when this is what I created.
This will not do at ALL!
I had decided that I was not going to make any sort of template or pattern because I want both books to look different.  So I picked up a piece of fabric and folded it in half and just stared sewing teeth.  It actually didn't look too bad... Until I tried to turn them right-side-out.

Back to the drawing board.

After some thought, I decided that making each tooth individually was the way to go.  Again, I didn't use any sort of pattern.  I just sewed what looked like a tooth.  Just one at first.  It looked perfect! So I went all out and sewed up a whole bunch.  Then I arranged them on the table and switched them around until I thought they looked right.
 
 
Then I put a little stuffing in each one and pinned it to the "gums".  I put a piece of batting between two layers of red to plump them up just a bit. 
 
 Made myself a tooth sandwich and sewed it up.
 
 
 I also made the tongues using red and a little batting for substance.
 
 
 And here is where my Monster Books of Monsters sit now.  All pinned together.  I need to sculpt around the eyes a little more.  Both of the girls just want to hug these guys, and they are supposed to be a little menacing.


Here is what they are trying to look more or less like. 
These images were found on a Google Images search for "Monster Book of Monsters"


Next I need to sew these together and come up with a way to get the title on them.
Thanks for looking and following my progress!
:) Pin It

Tuesday, March 26, 2013

Monster Book of Monsters: Part Two

I've lost my crafting mojo.  I just haven't been in the mood to craft.  Today, however, I decided that I need to finish these Monster Book of Monsters.  I've only been working on them for about ten months!!!  You can see the start here, if you'd like.


So, I got out my eyes and chose suitable ones.


I made little pillows to put them on, and attached the eyes.  These are very lightly stuffed so that they can be sculpted under the fur.
 
 
I carefully slit the fur after determining the position of my eyes.   Then I sculpted a little around the eyes. I will probably do a little more sculpting detail later.  He's going to have trouble seeing with all that fur in his eyes! 


 So I trimmed a little around the eyes.
This is where my Monster Book of Monsters stands at the moment. 


Next up: The teeth. I'm making them soft.  These will make or break this project, I think.
I have high hopes for this.

Thanks for looking!
:)

Pin It